I guess not in all of blog history, but definitely in MY blog history. I apparently suck at life because I thought that once my pictures were on the blog, they would stay there. Boy, was I wrong. I was able to recover a few, but it wasn't even worth putting them back in at this point! I was also foolish to think that since they'd be on my blog forever, that I wouldn't need to keep them on my phone or on the computer anywhere. Not even an iCloud or iTunes back up. I was basically asking for this to happen. I guess I just have to suck it up and get over it!
It's in the past now. I have to move on, start fresh and continue to post more baking adventures!! Sorry to those who are looking at this blog for the first time right now, there won't be much beyond this point. I promise that it was a blog full of fun things and pictures. Hopefully the tips are still a little helpful. :(:(:(:(:(
Until later,
A Very Sad Baker in Training
Saturday, March 30, 2013
Thursday, March 28, 2013
And what does she win? A BRAND NEW KITCHEN!
...Well, I didn't win it per say, but my apartment complex decided to remodel and gave me a new kitchen. That's a win in my book!! It definitely wasn't for free, mind you, our rent is definitely going up but at least only by a little. Either way, I HAVE A BRAND NEW KITCHEN!!!! Can you tell I'm excited? I so am.
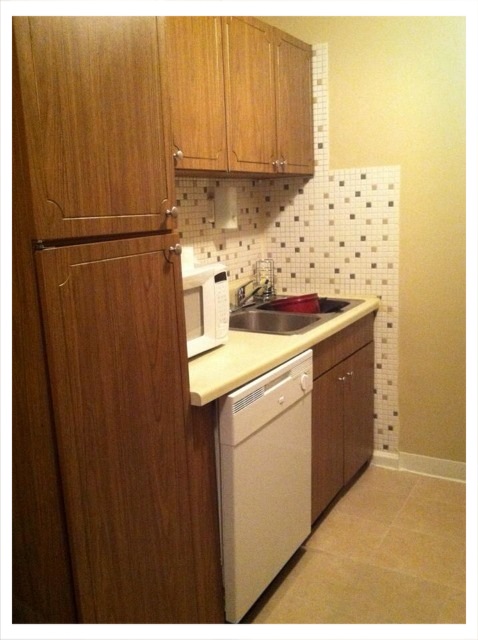
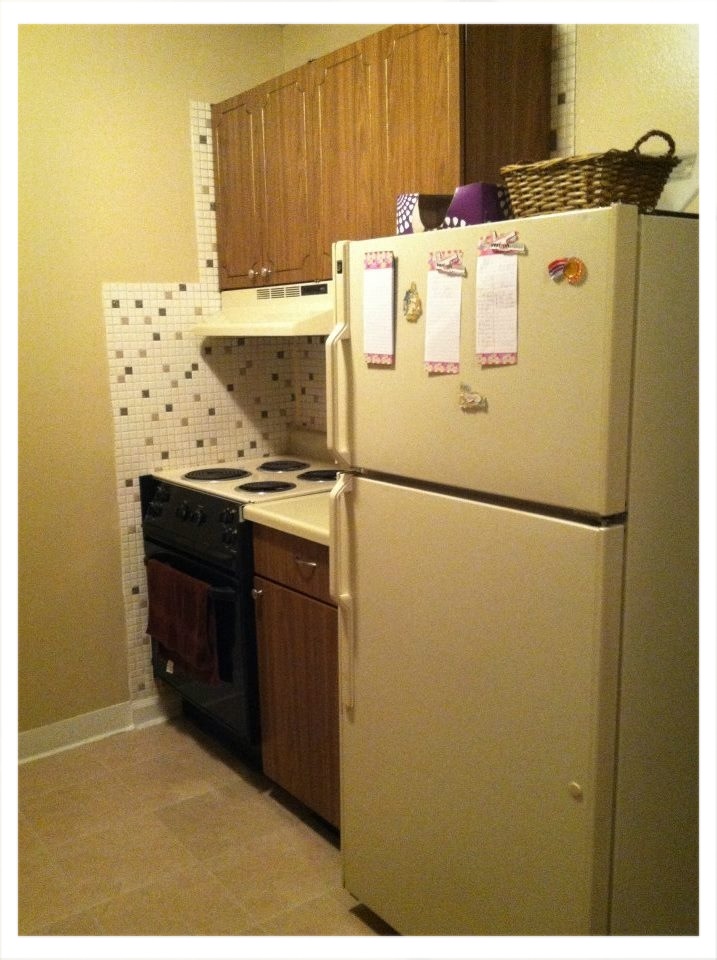
Now, I wasn't completely unsatisfied with the old one. It had a working (old) oven and a sort-of working disposal (clogged often) and refrigerator (leaked frequently). But, it was my kitchen and I loved it. I did not know, however, how much I would love a new kitchen with new appliances. I almost teared up I was so happy to be working with new things in the kitchen. I thought for sure I'd have to wait until I was in my permanent house in order to have new things but I stand corrected. So anyway, here is the before [top] and after [bottom] of my kitchen transformation. I just love it!


The day after the final remodel, it took them several annoying-couldn't-have-anything-in-the-cabinets-or-on-the-counter-tops days, I decided I wanted to bake something. I just HAD to break in that new oven!! I broke out my baking tools and set out to make brownies for the first time. Yes, my very first time baking brownies from scratch. [You thought I'd never get away from cupcakes, did ya?? :-P]
Well, let's just say (how many times have I said this?) the brownies didn't turn out as well as I'd hoped. I used this recipe from Pinterest Lunch Lady Brownies and it seemed like a solid one to me. *...Says the novice brownie baker...* But it most certainly was not or I just mixed it wrong or something. I honestly do not have any idea. This is what I ended up with:


I couldn't even eat a whole slice of it. Ryan ate one, but I think it was just to humor me. What a sweetheart! If he had baked them, I would've told him, "Um...this tastes like weird chocolate cardboard. Can I puke it up now?" Not really, because I'm not that mean, but that's what I would've at least said in my head! They must have been missing something or maybe I messed the steps up? Eh, I dunno. Either way, I threw them out! See ya later weird brownies!!
After that brownie debacle, I decided to retire brownies for now and start with something a little more simple. I started looking on Pinterest for a solid chocolate chip cookie (CCC) recipe and Boy! did I find one!!! 8 Secrects to the Perfect Chocolate Chip Cookie: I love this link because the author goes into the most amazing detail about do's and don't's of baking CCCs. She has a step-by-step guide to mixing and even has a troubleshooting section. Who would've thought of "cookie troubleshooting?" I'd never seen it before but this author really gives good pointers. It's too awesome!! I can say that after following those steps, I was much more confident in my cookies that I was in my brownies. They even tasted delicious, too!!!! So, without further ado, here they are:

Perfect, right? Well... close enough for me! I hope everyone has a great Easter weekend. Maybe I'll bake something Easter-y?
Until later,
Baker in Training
Now, I wasn't completely unsatisfied with the old one. It had a working (old) oven and a sort-of working disposal (clogged often) and refrigerator (leaked frequently). But, it was my kitchen and I loved it. I did not know, however, how much I would love a new kitchen with new appliances. I almost teared up I was so happy to be working with new things in the kitchen. I thought for sure I'd have to wait until I was in my permanent house in order to have new things but I stand corrected. So anyway, here is the before [top] and after [bottom] of my kitchen transformation. I just love it!
The day after the final remodel, it took them several annoying-couldn't-have-anything-in-the-cabinets-or-on-the-counter-tops days, I decided I wanted to bake something. I just HAD to break in that new oven!! I broke out my baking tools and set out to make brownies for the first time. Yes, my very first time baking brownies from scratch. [You thought I'd never get away from cupcakes, did ya?? :-P]
Well, let's just say (how many times have I said this?) the brownies didn't turn out as well as I'd hoped. I used this recipe from Pinterest Lunch Lady Brownies and it seemed like a solid one to me. *...Says the novice brownie baker...* But it most certainly was not or I just mixed it wrong or something. I honestly do not have any idea. This is what I ended up with:
Baking tip #14: Don't put your frosting on when the brownies are even the slightest bit warm. I thought to myself, "Sure, Self, these are cool enough that your frosting won't melt, separate and leave a weird sugar/butter mess on top of your cardboard brownies." I was WRONG. Cool completely. You'll thank me later.
Baking tip #15: Do some research with your recipes. Compare several different ones and see the commonalities and differences. Don't just pick one and assume it's going to be the best recipe ever, I learned that the hard way. Some recipes are better/worse than others. Let me just say I won't be using this recipe again... we just didn't mesh too well.
I couldn't even eat a whole slice of it. Ryan ate one, but I think it was just to humor me. What a sweetheart! If he had baked them, I would've told him, "Um...this tastes like weird chocolate cardboard. Can I puke it up now?" Not really, because I'm not that mean, but that's what I would've at least said in my head! They must have been missing something or maybe I messed the steps up? Eh, I dunno. Either way, I threw them out! See ya later weird brownies!!
After that brownie debacle, I decided to retire brownies for now and start with something a little more simple. I started looking on Pinterest for a solid chocolate chip cookie (CCC) recipe and Boy! did I find one!!! 8 Secrects to the Perfect Chocolate Chip Cookie: I love this link because the author goes into the most amazing detail about do's and don't's of baking CCCs. She has a step-by-step guide to mixing and even has a troubleshooting section. Who would've thought of "cookie troubleshooting?" I'd never seen it before but this author really gives good pointers. It's too awesome!! I can say that after following those steps, I was much more confident in my cookies that I was in my brownies. They even tasted delicious, too!!!! So, without further ado, here they are:

LOOK AT THAT SHINY, CLEAN, NEW OVEN!!! :):):)
Perfect, right? Well... close enough for me! I hope everyone has a great Easter weekend. Maybe I'll bake something Easter-y?
Until later,
Baker in Training
Thursday, March 7, 2013
DOUGHNUTS!!!!! or DONUTS??
Do I have your attention now?? No matter the spelling, (for my own purposes, I choose "doughnuts"), those rings of heaven are truly amazing. Now, I will preface this post with this simple fact: fried doughnuts, or however Krispy Kreme makes them, are the best ever. However, since I do not own a deep frier and would honestly never want one, I decided to try baking my doughnuts.
It all started with a trip to Goodwill. I was killing some time, waiting for a coworker to get off of work when I stopped by the thrift store. I perused the isles, not expecting to find anything, when BAM! I see these pans:

How adorable are those? Never in my life would I expect to find doughnut pans at Goodwill. Needless to say, along with a Unicorn painting, I purchased the $2.00 pans and went on my merry way. That evening, as I was waiting for Ryan to get home, I thought to myself, "What the hell, I want to make doughnuts!!" So, I scrubbed the pans and went to work. I found this recipe (thanks again, Pinterest) Mini Baked Donuts and started mixing.
I'll just cut to the chase and say that my doughnuts didn't turn out that wonderful. I'll just show you what I mean...

Baking Tip #12: As you can see, I overfilled the circles. Try to only fill them about a third of the way full. I just used a gallon zip lock bag and cut the tip off of it and piped the dough into the pans. Little did I know that some would be filled way too much and look like weird little mushrooms instead of doughnuts. See? ---->

Anyway, I then moved onto the glaze/icing. It was very simple but it was way too sweet! I'm not quite sure how doughnut makers get the glaze to be sweet but not "hurt your teeth" sweet. Ya know what I mean? I added sprinkles just for looks because they definitely didn't help the sweet factor. Also, the glaze was very thin so, Baking Tip #13: Double dip the glaze (if you like the taste of it) to get that thick, pretty looking glaze that the professionals always have. Let the first layer dry for just a little bit and then go in for the second! Well... do that before you add your toppings, of course! :):)


So my doughnuts looked okay, but they didn't taste very good. They were as hard as hockey pucks within the hour (don't ask me why, I have no clue). But!! Never fear! Not all was lost because I decided to bake something completely different. My best friend in the universe [BFITU] and her fiance sent a mason jar cookie mix to us for Christmas. Yeah, I hadn't baked them until now... No judging! They were juuust fine!! So, since my doughnuts were a bust, I mixed together these little babies and they were delicious! Here they are:


They were wonderful and my guests (interviewees for the grad program that Ryan's in) enjoyed them as well. Thanks, Steph and Keith! Hopefully my next batch of doughnuts goes better than this one, but at least I had a backup plan.
Until later,
Baker in Training
PS. I'm in the market for a good-but-not-a-million-dollar digital camera if y'all have any suggestions! Thanks!
Subscribe to:
Posts (Atom)